What white-glove delivery actually includes
In short
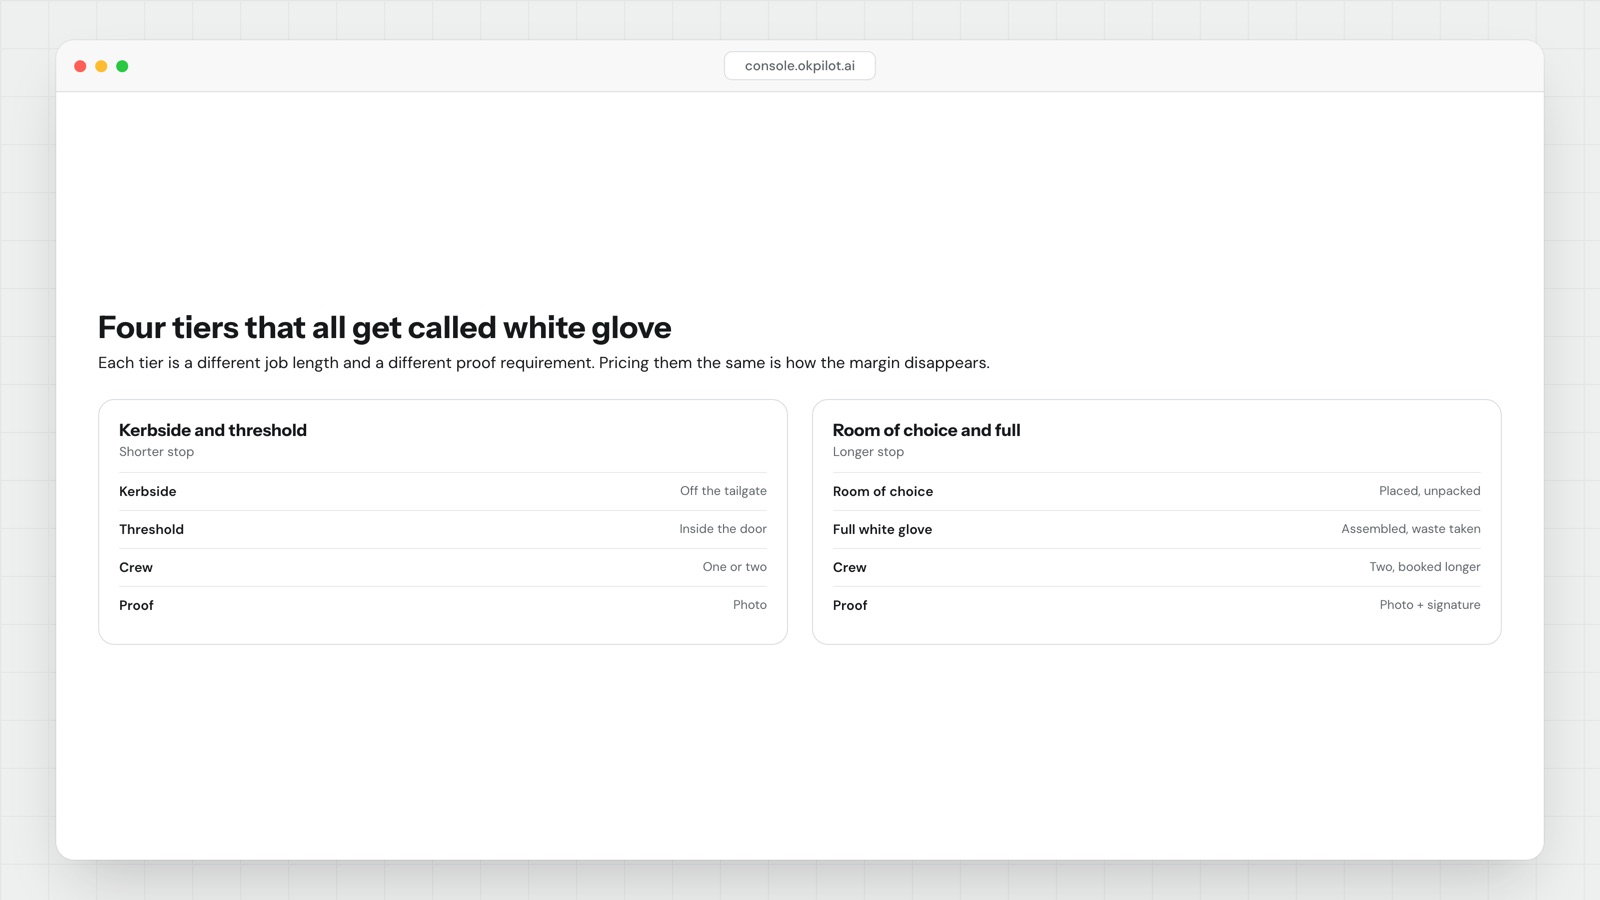
White glove delivery is not one service. It covers four distinct tiers — kerbside, threshold, room of choice, and full service with assembly and packaging removal — and the term is used for any of them depending on who is selling. Each tier is a different job length and needs different proof.
| Tier | Where the item ends up | Crew does | Proof that closes the job |
|---|---|---|---|
| Kerbside | Tailgate, kerb, driveway | Unloads, nothing else | Photo at the kerb, signature or geotag |
| Threshold | First dry place inside the door, or garage | Carries over the threshold, leaves packaged | Photo inside the door, signature |
| Room of choice | The room the customer names | Carries upstairs, unpacks if asked, positions | Photo in position, named signature |
| Full white glove | In place, assembled, packaging gone | Assembles, levels, connects, inspects, removes packaging and often the old item | Before photos of the route, photos in position, assembly checklist, named signature, waste note |
- The tiers differ in on-site minutes far more than in travel minutes. Pricing them on distance alone prices the wrong variable.
- Every tier above kerbside adds an access risk: stairs, lifts, doorways, building rules.
- Full service is the only tier where the crew touches the customer's walls and existing furniture, so it is the only tier where before photos are not optional.
- One flat delivery price across tiers transfers your margin from the easy jobs to the hard ones until the hard ones are loss-making.
What white-glove delivery includes, tier by tier
Kerbside. The vehicle arrives, the item comes off the tailgate, the customer takes it from there. One person can do it on a tail-lift, and nothing enters the building. Common for cheap large appliances and trade drops.
Threshold. The crew carries the item through the front door and sets it down in the first available dry space: the hallway, the garage, inside the shop door. Still packaged, still on the floor, no stairs. This tier is where most disputes live: "inside the door" and "inside the house" sound similar to a customer and mean very different things to a crew.
Room of choice. The item goes to the room the customer names, including up or down stairs. Usually unpacked, usually positioned. This is the first tier where the access survey matters: the door, the turn, the ceiling above the turn.
Full white glove. Everything in room of choice plus assembly, levelling, connection where relevant, a function check, packaging taken away, and often removal of the old item. Two people, a tool kit, and a visible amount of time on site.
Some operators split this further, usually a "white glove plus" for installation needing a qualified trade. Fine, as long as the split is written down and priced.
Each tier has a different proof requirement
This is the part most people skip, and it is the part that decides who pays when something goes wrong.
Kerbside needs almost nothing: a photo of the item on the ground and a record that it was the right address. The risk is narrow, because the crew did not go anywhere.
Threshold needs a photo taken from inside the door looking at the item in position. The dispute to defend against is "they left it on the drive".
Room of choice needs a photo of the item in the room and a signature from a named adult who agreed to the position. Position arguments are common and a photo ends them.
Full service needs the most, and specifically it needs the before set:
- Photos of the route in — hallway, skirting, banister, door frames — taken before the crew carries anything.
- Photos of the existing floor in the room.
- Photos of the item in place, assembled, from two angles.
- An assembly checklist: feet fitted, doors aligned, drawers running, unit levelled, tested where it has a function.
- A named signature confirming position and condition.
- A note of what was taken away, if anything.
The before photos are not for the customer. They are for the claim three weeks later about a scratch on the stair nosing. Proof capture on this kind of job is only useful if it is structured: a reason-coded checklist beats five loose photos and a free-text box, because you can audit it.
The rule worth holding: the more of the customer's home the crew enters, the more of it you photograph before you start.
Why one price across tiers takes the margin
Here is the arithmetic. Say a loaded crew hour costs you 50 per person, in whatever currency you work in.
A one-person kerbside drop that takes 10 minutes on site costs about 8 in labour. A two-person full white-glove job with assembly that takes 70 minutes costs about 117. That is a fourteen-fold difference, and none of it is driving. Those minute figures are made up for the arithmetic; use your own, which you can measure this week.
Now the second effect, the one that quietly hurts. A full-service job occupies roughly the slot of four kerbside drops, so a van that manages 18 kerbside drops in a day manages four or five full-service jobs. At the same delivery fee, the full-service day earns about a quarter of the revenue against the same fixed vehicle and driver cost.
A workable price floor:
Price floor for a tier =
    (median on-site minutes + travel share per job)
       x crew size
       x loaded cost per person-minute
  + (failure rate for that tier x cost of one failed attempt)
  + waste disposal cost, if packaging removal is included
  + margin
The failure term is the one people forget. Kerbside almost never fails for access. Room of choice and full service fail on stairwells, lifts and building rules, and the cost of a second attempt on a large item lands entirely on the tier that caused it. Price them alike and the easy jobs subsidise the hard ones, which is a reasonable thing to decide on purpose and a bad thing to discover by accident.
Measure your own minutes per tier
There is no credible published figure for on-site minutes by white-glove tier, and anyone quoting one has estimated it. Your own number is two weeks away.
Your field app already stamps an arrival time and a completion time. The gap between them is dwell time. So:
- Make the tier a required field on every job. Four values, no free text.
- Export arrival and completion timestamps for 30 days.
- For each tier, take the median and the 90th percentile of dwell, not the mean. The mean is dragged around by one nightmare job; the p90 is what you need for scheduling.
- Split room-of-choice and full service again by floor level: ground, first, second or higher, lift available. That is usually where the spread comes from.
- Count failed attempts per tier and divide by jobs attempted. That is your failure rate per tier.
Price on the median, build the day on the p90. Scheduling on the median guarantees half your full-service jobs run late, and a late full-service job is an hour of overtime, not five minutes.
Put the tier on the job, not in the notes
If the tier lives in a sales note or an order comment, the crew finds out what they signed up for when they open the van. Everything downstream depends on it being a structured field: slot length, whether two people are assigned, whether a tool kit and a waste bag are on board, which proof checklist appears in the app, what the customer was told, and what you charged.
The same field should drive the customer-facing message, because the most common white-glove complaint is not bad service. It is correct service that did not match what the customer thought they had bought.
OkPilot takes the tier as part of the job and sizes the slot and the proof checklist from it, with a person approving any change before it moves. Detail on the delivery management software page, and the access side in routing is solved, getting inside is not.
See OkPilot running your own operation
A live walkthrough with a real person, configured to your jobs on the call. About ten minutes. Setup takes around 48 hours.